



The Saunders Lumbar Home Traction Device is a portable pneumatic system for clinician-prescribed traction of the lumbar, or lower-back, region. The user lies on the device, secures the upper and lower harnesses, and uses a hand pump with a gauge to gradually apply and monitor the prescribed pulling force.
This practical guide explains:
- How to position the Saunders Lumbar Traction Device
- Where the upper and lower harnesses should sit
- How the PUMP, HOLD, and RELEASE controls work
- How to use flexed, neutral or extended positioning
- What to do when the gauge reading decreases
- How to clean, store and troubleshoot the device
- When treatment should be stopped
For current ordering information and complete product features, visit the Saunders Lumbar Traction product page. To compare home and clinical traction equipment more broadly, browse our cervical and lumbar traction collection.
Prescription-device notice: The Saunders Lumbar Traction Device is intended for use by a licensed medical professional or by a patient acting under a licensed professional’s direction. The prescribed force, body position, treatment time, frequency, and any hold-and-relax intervals must be established before home use. Traction should never cause pain.
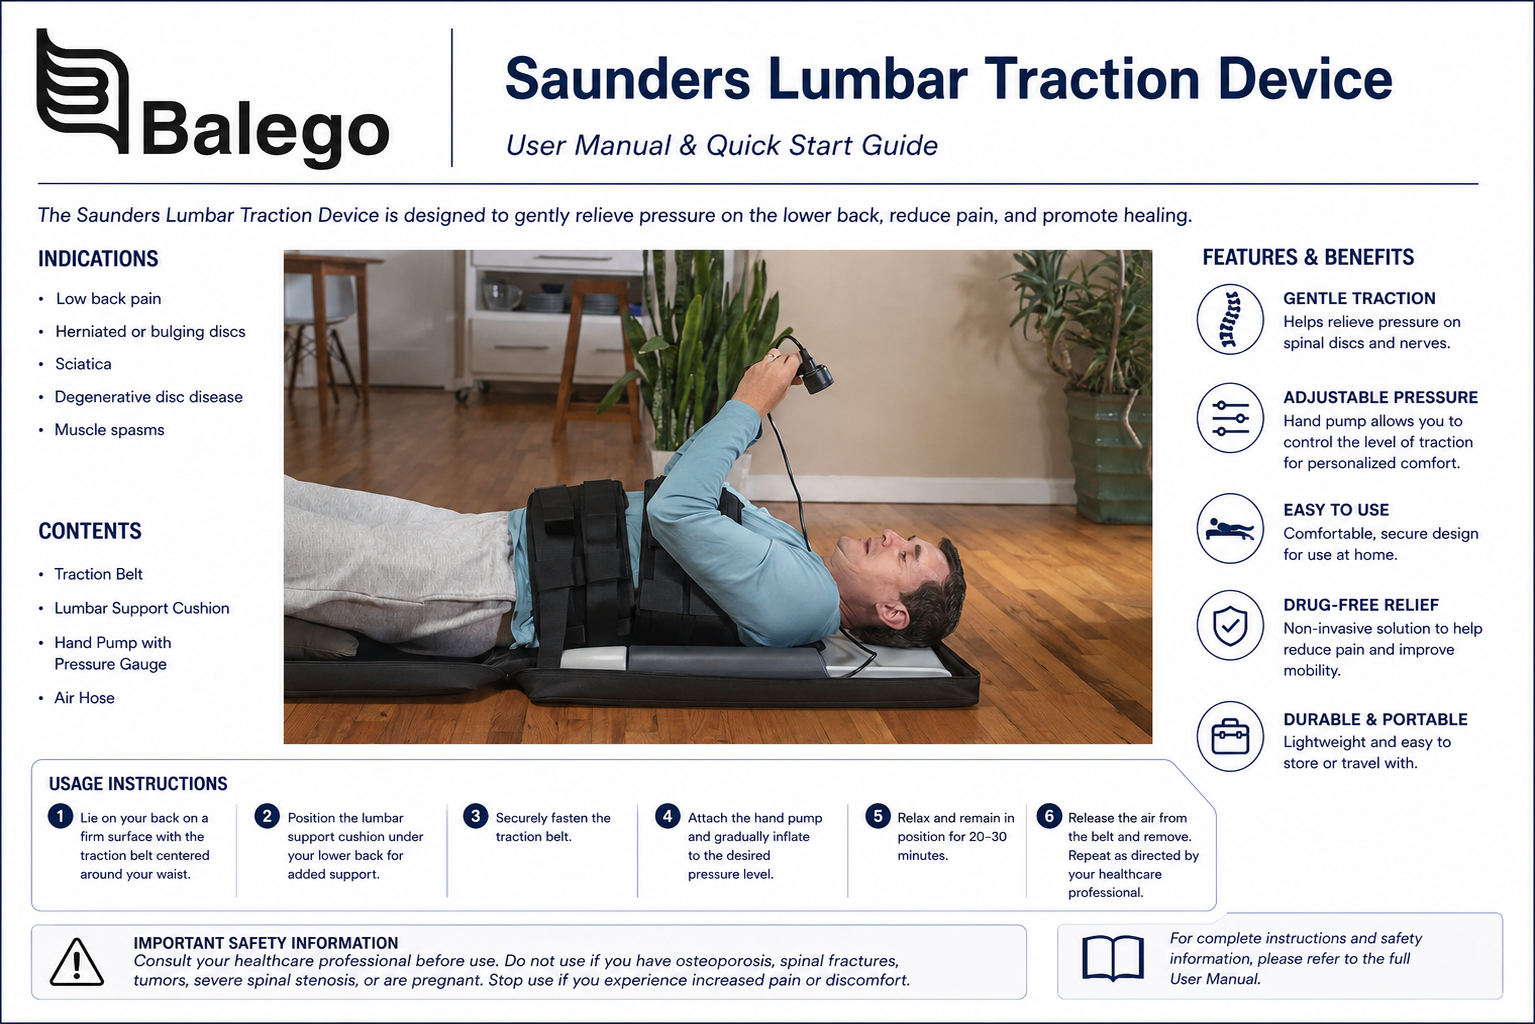
Saunders Lumbar Traction at a glance
| Feature | Saunders Lumbar Traction details |
|---|---|
| Treatment region | Lumbar spine and lower back |
| Intended setting | Clinician-directed home use or supervised clinical use |
| User position | Supine, or face down with assistance when prescribed |
| Force source | Pneumatic cylinder operated by a hand pump |
| Force monitoring | Integrated gauge |
| Pump positions | PUMP, HOLD, and RELEASE |
| Harness system | Separate upper and lower stabilization harnesses |
| Positioning options | Flexed, less flexed, neutral, slightly extended or prone |
| Electricity required | No |
| Treatment timer | Not included; use a clock, watch or timer |
| Portability | Carrying case with detachable wheels |
| Intended user | Licensed professional or patient under professional direction |
| Use between patients | Clean all body-contact surfaces between users |
| Prescription status | Prescription only |
The device arrives substantially ready for use and does not require a powered traction motor. Its manually operated pump allows the user to increase, maintain, or release force according to the prescribed instructions.
What the Saunders Lumbar Traction Device does
Lumbar traction applies a controlled pulling force through the trunk and pelvis. The Saunders system uses two fitted harnesses and a low-friction moving surface so the pneumatic cylinder can create the prescribed stretch while the user remains supported.
It should not be described as
- Permanently separating the vertebrae
- Reversing arthritis or disc degeneration
- Returning a herniated disc to its original position
- Guaranteed spinal decompression
- A cure for sciatica or back pain
- A replacement for medical evaluation, exercise or rehabilitation
A more accurate description is that it provides controlled, repeatable lumbar traction for selected patients under professional direction.
Conditions listed in the Saunders user guide
The current manufacturer guide states that a healthcare provider may prescribe the device for symptoms or conditions including those below. The presence of one of these conditions does not automatically establish that traction is safe or appropriate.
| Manufacturer-listed indication | Appropriate interpretation |
|---|---|
| Back pain | A clinician must first determine whether the pain presentation is suitable for traction |
| Muscle tightness | Traction may be considered as one component of a broader mobility plan |
| Joint stiffness | Position and force must be individualized |
| Sciatica | The cause of radiating symptoms should be evaluated before treatment |
| Nerve-root compression | Neurological symptoms require professional examination and monitoring |
| Herniated discs | Traction does not repair or reverse the disc condition |
This article intentionally does not repeat the diagnosis-based force and duration table already available on the Saunders Lumbar Traction product page. Home users should follow their own written prescription rather than selecting a setting from a generalized online protocol.
Information to obtain before the first treatment
The patient should receive clear instructions for every item below.
| Treatment detail | Information the clinician should provide |
|---|---|
| Starting force | Exact gauge reading or prescribed range |
| Maximum permitted force | Upper limit the patient must not exceed |
| Treatment duration | Number of minutes after the device is placed in HOLD |
| Treatment frequency | Sessions per day or week |
| Traction style | Sustained or manually controlled intermittent traction |
| Hold-and-relax timing | Required only when intermittent treatment is prescribed |
| Body position | Flexed, less flexed, neutral, slightly extended or prone |
| Bolster placement | Whether pillows, a wedge or a knee bolster should be used |
| Progression | Whether and when force or duration may be changed |
| Stop rules | Symptoms requiring immediate discontinuation |
| Reassessment plan | When the clinician reviews treatment response |
Do not increase force, duration, or frequency because a previous treatment felt comfortable. The manufacturer warns that exceeding the clinician’s recommendations may aggravate the existing condition or cause another injury.
Saunders Lumbar Traction components
| Component | Function |
|---|---|
| Lower harness | Stabilizes the pelvic region and helps transmit the traction force |
| Upper harness | Stabilizes the torso against the upper part of the device |
| Harness belts and buckles | Secure each harness around the body |
| Belt organizers | Help keep the buckles aligned |
| Pneumatic cylinder | Creates movement when air is added through the pump |
| Hand pump | Increases, holds or releases traction |
| Gauge | Displays the applied force |
| Carrying case | Functions as the treatment base and protective storage case |
| Pump compartment | Stores the hand pump between uses |
| Detachable wheels | Assist with transport |
| User-guide compartment | Stores the wheels and instructions |
Before each treatment, examine the harnesses, buckles, pump, hose, gauge, and connections. Do not use the device if a component appears damaged or if the system cannot maintain the prescribed force.
How to prepare the Saunders Lumbar Traction Device
1. Choose a firm treatment surface
Place the closed unit on a firm bed or another stable treatment surface with the wheels facing upward.
A very soft or unstable surface can make positioning inconsistent and may interfere with getting on or off the device safely.
2. Remove the wheels and open the case
Remove the detachable wheels, unzip the carrying case, and open its lid toward the head of the treatment surface.
3. Remove the hand pump
Take the pump from the mesh storage compartment and place it where it can be reached comfortably with both hands.
4. Open the harness buckles
Release all buckles before lying down. Position the lower harness so it slightly overlaps the upper harness.
5. Prepare a timer
The Saunders device does not contain a treatment timer. Keep a watch, clock, or separate timer within view or hearing range.
6. Remove obstructive clothing and accessories
The current user guide directs users to remove belts and accessories and to move clothing away from the trunk and lower back. Direct harness contact with bare skin generally helps reduce slipping and creates a more consistent fit.
How to position yourself on Saunders Lumbar Traction
1. Align the lower harness
Lie on your back so the lower harness sits approximately one inch above the top of the hips. The upper edge of the lower harness should be positioned just below the navel.
This landmark is important. If the lower harness is too high, too low, or angled, the system may slip or apply force differently from the prescribed setup.
2. Add the prescribed positioning supports
Place pillows, bolsters, wedges, or towels only as directed. These supports change the position of the lumbar spine and can alter the response to traction.
3. Secure the lower harness first
Wrap the lower harness across bare skin and tighten the belts as snugly as possible without causing pain.
4. Secure the upper harness
Fasten the upper harness in the same manner. It should be secure enough to resist sliding but should not restrict breathing or cause painful pressure.
5. Confirm buckle alignment
Use the belt organizers to keep the buckles aligned. Check that no buckle, belt edge, or folded material is pressing uncomfortably into the body.
6. Check the complete setup before pumping
Before applying force, confirm that:
- The lower harness is just below the navel
- Both harnesses are snug
- The buckles are closed
- The belts are not twisted
- The pump is within reach
- The prescribed position has been reproduced
- The timer is ready
- You can release traction without assistance
The illustrated instructions show the lower-harness landmark, bolster options, and harness order.
Saunders lumbar positioning options
Body position changes the amount of lumbar flexion or extension. The clinician should select the position after evaluating which movements improve or worsen the patient’s symptoms.
| Position | How it is created | Lumbar position |
|---|---|---|
| Bolster beneath knees | Support the knees and lower legs with pillows, a bolster or a chair | Greater lumbar flexion |
| Legs straight | Lie flat with the knees extended | Less lumbar flexion |
| Towel beneath lower belt | Place a small towel or prescribed wedge under the lower stabilization belt | Neutral to slight extension |
| Prone position | Lie face down while another person secures the harnesses | Greater lumbar extension |
A higher degree of flexion or extension is not automatically better. The correct position is the one prescribed based on the examination and symptom response. Prone setup should be performed with a partner securing the harness.
How to use the Saunders hand pump
The gauge housing rotates among three labeled positions:
| Pump setting | What it does | When it is used |
|---|---|---|
| PUMP | Allows the cylinder to fill with air and increases traction force | During initial ramp-up or when restoring a prescribed reading |
| HOLD | Maintains the selected traction force | During the timed treatment period |
| RELEASE | Allows air to leave the cylinder and lowers force | To reduce excessive force or finish treatment |
Step 1: Turn the gauge housing to PUMP
Confirm that the label is aligned with the PUMP position before operating the handle.
Step 2: Pump slowly
Move the pump handle fully outward and fully inward. Both directions of the pumping motion contribute to filling the cylinder.
Watch the gauge continuously. Do not pump rapidly or look away from the gauge while increasing force.
Step 3: Stop at the prescribed setting
Stop when the gauge reaches the exact force or range supplied by the clinician. Do not continue pumping merely because the system is capable of producing a higher reading.
Step 4: Turn the housing to HOLD
Rotate the gauge housing to HOLD after reaching the prescribed setting.
Step 5: Start the treatment timer
Begin timing only after the pump has been placed in HOLD and the intended force is established.
The stretching sensation may be noticeable, but treatment should not produce pain. The official instructions direct users to increase force slowly and remain within the clinician’s guidelines.
Can Saunders Lumbar Traction provide intermittent traction?
The device primarily holds the selected force when the pump is in HOLD. If a clinician prescribes manually controlled intermittent traction, the patient may be instructed to alternate between the prescribed force, hold, and reduced-force intervals.
Intermittent use should not be improvised. The clinician must specify:
- High-force setting
- Lower or resting-force setting
- Hold duration
- Relax duration
- Number of cycles
- Total treatment time
A programmable clinical system may be more suitable when precise automatic pull-and-relax cycles are required.
Why does the gauge reading decrease during treatment?
The manufacturer states that a small decrease—approximately 10 percent—may occur as the spine and body relax or the patient moves slightly. A minor change does not automatically mean that the pump is leaking.
When a small decrease occurs:
- Confirm that the change is within the clinician’s instructions.
- Rotate the gauge housing from HOLD to PUMP.
- Add air slowly until the prescribed reading is restored.
- Return the gauge housing to HOLD.
- Remain still and continue monitoring the reading.
Do not repeatedly “chase” minor needle movement without considering body relaxation and normal motion.
A continuing or substantial loss of force may indicate a loose connection or an air-system leak and should be investigated before further use.
How to end a Saunders lumbar traction session
1. Turn the gauge housing to RELEASE
Release traction gradually rather than attempting to get out while force remains applied.
2. Confirm that the force has decreased
Wait for the cylinder and moving surface to return toward the starting position.
3. Loosen the harnesses
Slacken the belts and release the buckles only after traction has been released.
4. Remain lying down briefly
The manufacturer instructs the user to relax for a few minutes and gently move the pelvis from side to side before standing.
5. Get up slowly
Roll or transition from the device according to the clinician’s instructions. Avoid suddenly sitting or standing if the back feels stiff, lightheaded, or unstable.
6. Record the treatment response
Useful information includes:
- Date and time
- Prescribed position
- Highest gauge reading
- Treatment duration
- Symptoms before treatment
- Symptoms immediately afterward
- Any change in leg pain, numbness or weakness
- Adverse reactions
The manual describes a gradual release, brief resting period, and slow pelvic motion before leaving the device.
Saunders Lumbar Traction troubleshooting
| Problem | Possible explanation | Recommended response |
|---|---|---|
| The gauge does not increase | The pump is not in PUMP, stroke is incomplete or a connection is loose | Return housing to PUMP, use complete slow strokes and inspect connections |
| Gauge falls slightly in HOLD | The user relaxed or shifted position | Return briefly to PUMP, restore the prescribed reading and return to HOLD |
| Gauge continues falling | Possible loose connection or air leak | Stop treatment, inspect the hose and connections, and seek service if force cannot be maintained |
| Harness slides | Clothing is beneath the harness, belts are loose or placement is incorrect | Release force, reposition against bare skin and refasten |
| The lower harness moves upward | The lower harness may be too high or inadequately secured | Release traction and reposition it just below the navel |
| Buckles feel painful | Buckle alignment, belt folding or excessive tightness | Release force and correct the harness before restarting |
| Force feels uneven | Harnesses may be angled or one side may be looser | Release traction and refit both sides symmetrically |
| The pump is difficult to operate | Housing position or pump mechanics may be incorrect | Confirm PUMP position; do not force or dismantle the pump |
| Traction feels painful | Force, position or patient selection may be unsuitable | Release immediately and contact the prescribing clinician |
| Symptoms spread farther down the leg | Neurological or mechanical symptoms may be worsening | Stop treatment and obtain professional guidance |
| The device becomes wet | Liquid exposure may affect components and cleanliness | Do not immerse yourself; dry and seek support when necessary |
| The harness is damaged | Wear, tearing or buckle damage | Stop using the device and replace the affected component |
If the pneumatic system cannot maintain force after the connections have been checked, contact the supplier or manufacturer rather than attempting an internal repair. The manufacturer specifies that the system should be virtually leak-free while in HOLD.
Questions to check when force will not hold
Before assuming the device has failed, confirm:
| Question | Correct setup |
|---|---|
| Is the housing in PUMP while force is being added? | Yes |
| Is it in HOLD during treatment? | Yes |
| Is the user remaining still? | Yes, except for clinician-directed movement |
| Is the pump being operated slowly? | Yes |
| Are complete in-and-out strokes being used? | Yes |
| Are the hose and pump connections secure? | Yes |
| Are caps and threaded components seated? | Yes, but not overtightened |
| Is the harness slipping? | No |
| Is the decrease only a small change after relaxation? | This may be normal |
Connections may be tightened gently, but be warned against overtightening threaded components because the threads could be damaged.
Cleaning the Saunders Lumbar Traction Device
All device surfaces may be cleaned with a mild detergent or an appropriate disinfectant.
Cleaning procedure
- Release all force and remove the user from the device.
- Disconnect or set aside the pump as appropriate.
- Wipe the treatment surfaces, harnesses, belts, buckles, and body-contact areas.
- Do not immerse any part of the device in water.
- Leave the carrying case open until every surface has air-dried.
- Clean all body-contact surfaces between different users using the facility’s standard cleaning procedure.
Do not saturate the pump, gauge, hose connections, or pneumatic components. Follow the cleaning-product contact time and material-compatibility instructions. Users should not immerse the unit and should leave the case open while it dries.
How to store Saunders Lumbar Traction
After the unit is clean and completely dry:
- Return the pump to the mesh compartment.
- Fold the harnesses without sharply creasing or trapping the belts.
- Close the buckles where appropriate.
- Return the wheels and user guide to their storage compartment.
- Fully zip the protective carrying case.
- Store the unit where the hose, gauge, and harnesses will not be crushed.
- Keep the equipment away from children, moisture, and extreme environmental conditions.
The case serves as both the treatment base and the storage enclosure, so it should be dry and free from debris before being closed.
Saunders lumbar traction replacement parts
| Replacement component | Manufacturer part number |
|---|---|
| Upper and lower harness kit | 199630 |
| Hand-pump replacement kit | 199614 |
| Lumbar pump assembly | 199633 |
| Carrying case with wheels | 096495 |
| Wheel kit | 199634 |
| Belt-extension kit | 199635 |
| User guide | 360369 |
| 48-inch extension belt | 631374-001 |
| 96-inch extension belt | 630483-001 |
Part availability can change. Please confirm the exact device version and part number before placing your order. For assistance, contact Balego. The current manufacturer guide lists these components and part numbers.
Saunders Lumbar Traction contraindications
The current manufacturer manual says lumbar traction should not be used in the presence of the following conditions. This list should be applied as part of professional screening, not used for self-diagnosis.
| Manufacturer-listed contraindication |
|---|
| Acute or traumatic injury |
| Rheumatoid arthritis |
| Spinal instability |
| Spinal-cord compression |
| Fracture |
| Malignancy |
| Infection or inflammatory disease |
| A condition that may be worsened by movement |
| Structural disease secondary to tumor or infection |
| Vascular compromise |
| Joint instability of the spine |
| Pregnancy |
| Claustrophobia |
| Cardiac or pulmonary problems |
| Osteoporosis |
| Hiatus hernia |
Some of these conditions may not be obvious based on symptoms alone. New back pain following trauma, unexplained weakness, systemic illness, or progressive neurological changes requires medical evaluation rather than a trial of home traction.
When to stop lumbar traction immediately
Turn the pump housing to RELEASE and discontinue treatment if there is:
- Increased back or neck pain
- Increased arm or leg pain
- Pain spreading farther into an extremity
- New or increasing numbness
- New weakness
- Dizziness
- Nausea
- Swelling
- Headache
- Breathing difficulty
- Unusual pressure from the harnesses
- Any other concerning reaction during or after treatment
Some patients may experience headaches or increased pain following traction. Before another session, the treating professional should discuss continued use.
Seek urgent medical care for symptoms such as rapidly progressive weakness, new loss of bladder or bowel control, saddle-area numbness, severe trauma, or other signs of a potentially serious spinal condition.
Where lumbar traction fits in evidence-based rehabilitation
Research does not support presenting lumbar traction as a universally effective treatment for all low-back pain. A systematic review of mechanical traction for lumbar radiculopathy found possible short-term improvements when supine traction was added to physical therapy, but those positive findings were based on low-quality evidence. Higher-quality prone-traction studies did not show statistically significant improvements.
A conservative clinical approach is to use traction, when appropriate, as a time-limited symptom-management trial within a broader plan that emphasizes education, graded activity, mobility, strengthening, and return to function. Response should be measured rather than assumed.
| Appropriate evidence-informed framing | Wording to avoid |
|---|---|
| May provide temporary symptom modification for selected patients | Cures sciatica |
| May be used as an adjunct to active rehabilitation | Repairs herniated discs |
| Treatment response should be reassessed | Guaranteed decompression |
| Force and position must be individualized | One setting works for everyone |
| Stop if symptoms worsen | More force gives better results |
| Home treatment requires professional direction | Safe for anyone with back pain |
Saunders Lumbar versus clinical traction systems
The Saunders unit is designed for portable, patient-operated lumbar traction under professional direction. Clinics needing automatic cycles, multiple pull patterns, protocol storage, and electronic timing may require a professional traction platform.
| Product | Setting | Force delivery | Treatment control | Best fit |
|---|---|---|---|---|
| Saunders Lumbar Home Traction Device | Home or limited clinical use | Manual pneumatic pump | User-operated PUMP, HOLD, and RELEASE | Repeatable clinician-prescribed home lumbar traction |
| Chattanooga Triton Traction Unit | Professional clinic | Motorized electronic system | Static, intermittent and cyclic programs with programmable phases | Clinics needing automated traction protocols |
| Triton DTS Basic and Advanced Accessory Packages | Professional clinic | Programmable Triton DTS unit | Includes traction unit, lumbar belting and bolster; Advanced adds cervical equipment | Clinics building a complete DTS traction workflow |
| Chattanooga Triton DTS 6E Traction Table | Professional clinic | Requires a separate compatible traction unit | Powered multi-section patient positioning | High-volume clinics needing an advanced table platform |
The Saunders system requires no electrical power and is portable, but it does not provide automatic programmable pull patterns. The Triton equipment is designed for trained clinical environments and requires compatible tables and accessories. The DTS 6E listing is for the treatment table itself; the traction unit and accessory package are separate.
Frequently asked questions
Where should the lower Saunders harness be positioned?
The upper edge of the lower harness should sit just below the navel, approximately one inch above the top of the hips.
Should the harnesses be worn over clothing?
The manufacturer recommends moving clothing away so the upper and lower harnesses contact bare skin. This improves grip and helps reduce slipping.
Which harness is fastened first?
Secure the lower harness first, followed by the upper harness.
When should I start timing the treatment?
Begin timing after the prescribed force has been reached and the gauge housing has been turned to HOLD.
What is the difference between PUMP and HOLD?
PUMP allows air to enter the cylinder and increases traction. HOLD maintains the selected force.
How do I reduce the traction force?
Rotate the gauge housing toward RELEASE. Do not loosen the belts or try to leave the device while significant force remains applied.
Is a small decrease in the gauge reading normal?
A small decrease of approximately 10 percent can occur as the body relaxes or moves. Restore the prescribed reading only according to the clinician’s instructions.
Does the Saunders Lumbar Traction Device have a timer?
No. Keep a separate timer, watch, or clock available.
Can it provide intermittent traction?
Manually controlled intervals may be possible when specifically prescribed, but the device does not automatically perform programmable pull-and-relax cycles.
Can I use more force when treatment stops feeling strong?
No. A reduced sensation does not authorize an increase. Remain within the exact range prescribed by the healthcare professional.
Can the device be used in a prone position?
The manufacturer includes a face-down positioning option for greater lumbar extension, but another person must secure the harnesses, and the position should be used only when prescribed.
What should I do when the harness slips?
Turn the pump to RELEASE, allow the force to decrease completely, and refit the harnesses. Do not attempt to tighten or reposition them while traction remains applied.
What should I do when pain increases?
Please release traction and stop the session. Contact the prescribing professional before using the device again.
Is Saunders Lumbar Traction a spinal decompression machine?
It is more accurately described as a pneumatic lumbar traction device. “Spinal decompression” is frequently used as a marketing term, but it should not imply permanent structural change or guaranteed symptom relief.
Saunders traction products and support
Purchase the Saunders Lumbar Home Traction Device, compare additional cervical and lumbar traction equipment, or review the related Saunders Cervical traction setup and safety guide.
Clinics comparing table-mounted systems can also review the Chattanooga Triton DTS traction packages and Balego’s traction-table setup and maintenance resources.
For help confirming product compatibility, replacement parts, or ordering information, contact Balego.

